Monday, 25 April 2011

Piecework using Friendly Plastic

Friendly plastic piecework technique
Supplies needed:
3 strips of friendly plastic, rolling pin or tube, strong scissors, cooking oil, small towel, strong tin foil, pokey tool or similar, heat source, heat gun, thermometer


The friendly plastic will only work if the water temperature is between 60 - 70 degrees celsius.  Any lower and it will be too cool to melt the plastic, any higher it will be too hot and the plastic will go all gooey!!!!


You can simply have a pan on the gas or the electric hob.  If you have the choice I would recommend the hairdryer style heat gun opposed to the other type.  If you only have the other type, it's not a problem, but just keep in mind it gets hotter quicker.


Cut some strips off your plastic in differing widths.


Arrange them in a pleasing order.


Taking the opposite ends you are going to 'tack them together using the hot water.


Place the opposite ends in the water for about 10 seconds.


Bring them out and push them together as above.


They should look like this.  They won't feel that stable, as you've only attached them together at each end.


Carry on with the pairs tacking them together as above.


Once they are done, take 2 sets of 2 and tack them together using the same process.  So above I have tacked a 2 and a 2 and a 2 and a 2 and a single piece.
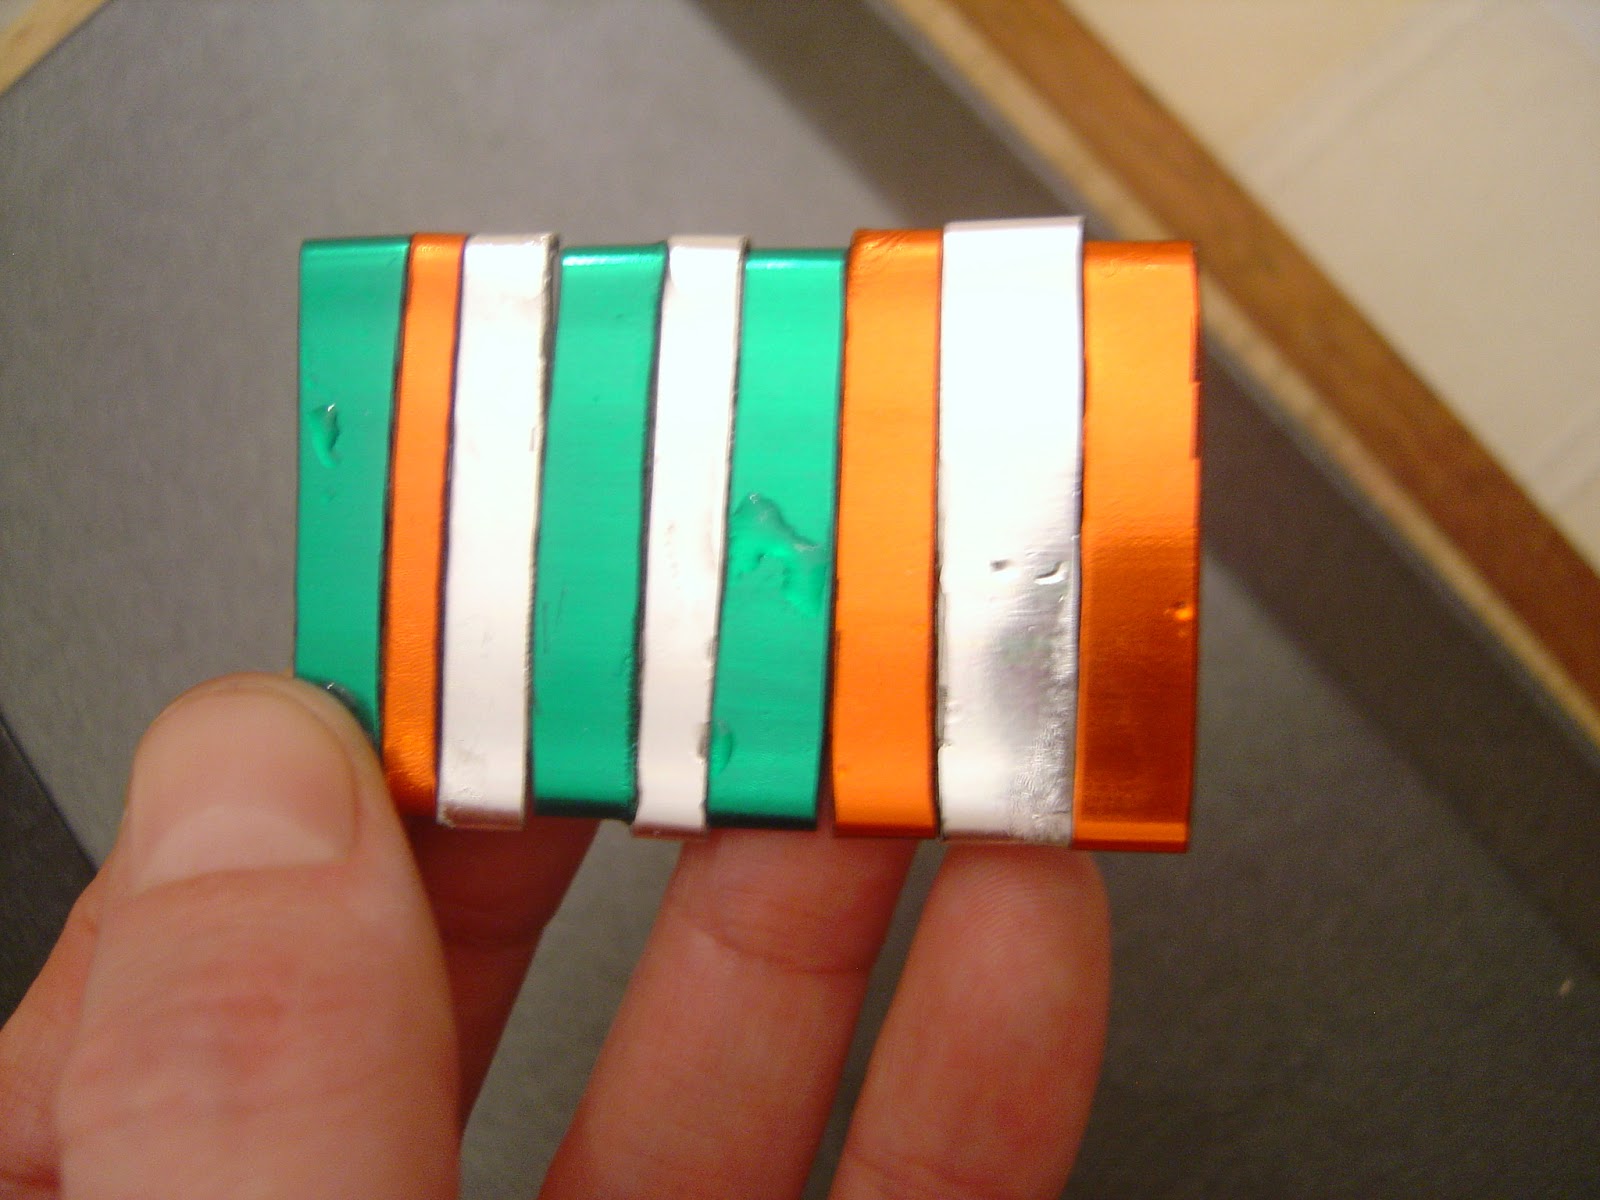

I then took the 2 pieces above and tacked them together, so now I have a full strip.


Place the full strip on a piece of tin foil.


Float it in the hot water. 


After about 10 - 15 seconds, push the tin foil in the water and the strip should submerge itself. Leave in for about 20 - 25 seconds.


You can tell if the plastic has melted enough as when you pull it out it will 'bend' on the foil.  If it does not bend, it needs to stay in longer.


Once out of the water, rub a tiny bit of household cooking oil on your finger.  Rub it over the creases.  This will smooth it and fill in any gaps without leaving your finger prints on the plastic.


Take a small rolling pin / tube and roll once over the strip. 


Then place in cold water to cool.


After 20 seconds pull it out of the water and dry it off.  The tin foil can be used again and again and again.


Take your strip and cut thinner strips off in different widths again, this time length ways as shown above.


Mix the strips until you are happy with the way they look the same as above.


Using the exact same process, 'tack' the first 2 pieces together and so on


until all 5 strips are tacked together.


Dunk in the hot water again, exactly the same as you did when making the first strip.


Pull it out the hot water, put some cooking oil on your finger, rub along the joins.


Roll once with your rolling pin or tube.


Dunk in the cold water to cool for about 20 seconds.


Dry off on the towel.


And this is your piece of piecework friendly plastic.

The piecework technique was founded by Liz Welch and I strongly recommend that you check out both her blog and her DVD, 'Bend it, shape it'.  Without it this tutorial would not have been possible.

Saturday, 15 January 2011

Texture


Nail and wood background texture
Supplies needed:
Small nails, wood shavings, tissue paper, pva/mod podge, paint brush, chip board shapes / shapes made from thick cardboard, 2 contrasting colours of acrylic paint


Cover the shapes with pva/mod podge and arrange the nails and wood shavings as desired.


Scrunch up a piece of tissue paper larger than the area you want to cover.  Uncrumple the paper and press over the shapes.  Do not be too heavy handed or you will tear it, but ensure that it is stuck down.


Give the shapes a further coat of pva/mod podge and when dry tear or cut the excess tissue paper away.


Next paint the shapes (I used the eco friendly acrylic green patina paint)


Once dry, take your contrasting colour and rub it over the hi-lighted areas.  I like to use my finger but you can use whatever suits you best.  Don't put too much on to start with, you can always add more. 


I used the bronze eco friendly acrylic paint and this is the end result.


You can use any material under the tissue paper, don't just stick to wood and nails - experiment!!!!


Wednesday, 28 October 2009

Beeswax


you will need some beeswax and a means of heating it - if you don't have a melt pot an oil burner with a nightlight will work perfectly ok. I keep a pan for my melt pot especially for beeswax. I also use a brush kept again just for beeswax


A photo and some cardstock


Paint the beeswax on - gradually bulding up the layers until you can hardly see the photo


I scraped the wax away from the faces then soften the wax with my heat gun and stamped all around with swirl image.

Gorgeous smell in my craft room - I'll probably use this piece on the front of one of my books

Friday, 18 September 2009

Masking Tape Background

You will need:-

Card stock
Masking tape
Dye inks
Clear embossing powder
Heat gun

Start by tearing up your masking tape and putting it on to your card stock


Cover the whole of the card stock leaving no spaces


Ink over the card stock - I used Butterscotch


Sponge some contrasting ink on - I used ginger


Add another colour if you want to - I added a bit of lettuce


Cover the whole sheet with clear embossing powder - no need for a holding medium


Use your heat gun to melt the powder


The finished piece all ready to cut to size and use on your cards, atc's or whatever

Monday, 17 August 2009

Peeled Paint Magazine Rack

You will need

magazine Rack - I got mine at Ikea
Acrylic paint - 2 colours
Gesso
Torn Papers
Vaseline
Kitchen Roll


I painted my Rack with Gesso and left to dry


I then coated it with watered down acrylic in yellow and let dry


I stuck on pieces of torn paper


I put vaseline over some of the paper and here and there on the paint


I then painted a coat of green acrylic all over - allow to dry


I wiped off all the vaseline with kitchen roll - a bit messy but I like the finished result


This is the spine


And this is one I have done using yellow and brown acrylic and leaving out the torn paper stage.

They are both ready now to add embellishments of your choice